 Save to Pinterest
 My morning alarm went off at 6:15, and for once I wasn't dreading breakfast. I'd been experimenting with protein pancake bowls all week, trying to crack the formula for something fluffy and satisfying without the usual banana mush. The smell of vanilla and baking powder filled my tiny kitchen as the bowl puffed up in the oven, and I realized I'd finally nailed it. No flipping, no standing over the stove, just one bowl that baked itself while I answered emails. It became my favorite kind of breakfast: the kind that feels indulgent but fuels me until lunch without the mid-morning crash.
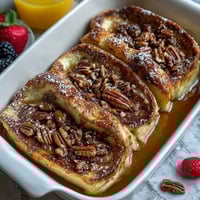
I made this for my sister when she visited last spring, and she couldn't believe it was high-protein. She kept poking the center with her fork, convinced I'd hidden something unhealthy inside. We ate them on the balcony with coffee, hers topped with peanut butter and mine with frozen raspberries that bled pink into the warm batter. She asked for the recipe before she even finished eating, and now she texts me photos of her versions every Sunday morning.
Ingredients
- Large egg: Provides structure and helps the batter rise into a fluffy, cake-like texture without any greasiness.
- High-protein yogurt (50 g): Greek or skyr works best for moisture and tang, and it keeps the protein count high without adding much fat.
- Milk (70 ml): Any type works, soy adds creaminess and extra protein, almond keeps it light, and dairy makes it richer.
- All-purpose flour (35 g): Swap for oat, spelt, or gluten-free blend depending on what you have, each gives a slightly different chew.
- Vanilla or white chocolate protein powder (25 g): This is what makes the bowl satisfying, look for one that bakes well and doesn't turn gritty.
- Sweetener (5 g, optional): A teaspoon of sugar, stevia, or monk fruit rounds out the flavor, but skip it if your protein powder is already sweet.
- Baking powder (1/2 tsp): The magic ingredient that makes the batter puff up and stay fluffy, don't skip or reduce this.
- Optional toppings: Berries, chocolate chips, nuts, or shredded carrot can be folded in before baking, or add peanut butter and syrup after for contrast.
Tired of Takeout? 🥡
Get 10 meals you can make faster than delivery arrives. Seriously.
One email. No spam. Unsubscribe anytime.
Instructions
- Preheat and prep:
- Turn your oven to 180°C (356°F) and choose a ramekin or oven-safe bowl that holds at least 650 ml, anything smaller will overflow. Lightly grease it if yours tends to stick, though most batters release easily once cooled.
- Mix the batter:
- Crack the egg directly into the bowl, add yogurt, milk, flour, protein powder, sweetener, and baking powder, then whisk until completely smooth with no lumps. The batter should be thick but pourable, like a soft cake batter, not pancake-thin.
- Add toppings (optional):
- Gently fold in berries, chocolate chips, or nuts if you want them baked into the bowl. Save peanut butter, syrup, or extra yogurt for after baking so they stay creamy and don't cook into the batter.
- Bake:
- Place the bowl in the center of the oven and bake for 20 to 22 minutes, until the top is lightly golden and the edges pull away slightly. The center will look a little soft when you take it out, but it will firm up as it cools, so don't overbake.
- Cool and serve:
- Let the bowl sit for 5 to 10 minutes before eating, this waiting time is crucial for the texture to set. Top with whatever you're craving and eat it straight from the bowl with a spoon.
 Save to Pinterest
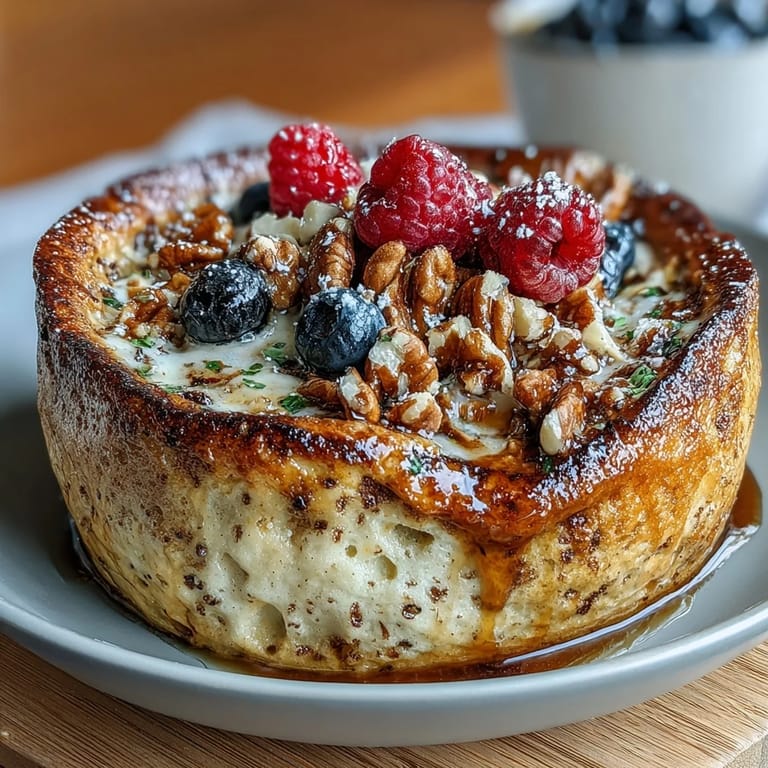
 One Saturday I made four of these in different bowls, each with a different topping combination, and lined them up on the counter like a tasting flight. My roommate wandered in, tried the one with frozen blueberries and dark chocolate chips, and declared it better than any bakery muffin. We reheated the leftovers all week, and I realized this wasn't just a single breakfast, it was a system. Now I bake a batch every Sunday and stack them in the fridge, knowing I have five mornings solved before the week even starts.
How to Store and Reheat
Once cooled, cover each bowl tightly with plastic wrap or transfer to an airtight container, then store in the fridge for up to five days. For longer storage, wrap each bowl individually in foil and freeze for up to a month, they thaw quickly and taste just as good. Reheat in the microwave for 60 to 90 seconds, checking halfway so the center warms evenly without drying out the edges. I like to add fresh toppings after reheating so they stay bright and don't get soggy in storage.
Flavor Variations to Try
Stir a half teaspoon of cinnamon into the batter for a warming spice note, or add a pinch of cardamom if you want something a little unexpected. Lemon or orange zest folded in before baking brightens the whole bowl and pairs beautifully with berries. For a richer version, swap half the milk for a mashed ripe banana (even though the base recipe doesn't need it), or fold in a tablespoon of cocoa powder and top with peanut butter for a chocolate version. I've also tried shredded carrot and a pinch of nutmeg, which turned it into something like carrot cake for breakfast.
Common Mistakes and Fixes
The biggest mistake is overbaking, which turns the soft, moist center into something dry and crumbly. Pull it out when the top is just set and the edges are golden, even if it jiggles slightly in the middle. Another pitfall is using a protein powder that doesn't bake well, some turn gritty or bitter in the oven, so test a small batch first if you're trying a new brand. Don't skip the resting time after baking, those five minutes are when the texture transforms from wet batter to fluffy cake.
- If your bowl overflows, use a bigger ramekin next time or reduce the batter by a quarter.
- If the texture is too dense, check that your baking powder is fresh and that you're measuring the flour correctly.
- If it tastes chalky, switch to a different protein powder or reduce the amount slightly and add a bit more flour.
 Save to Pinterest
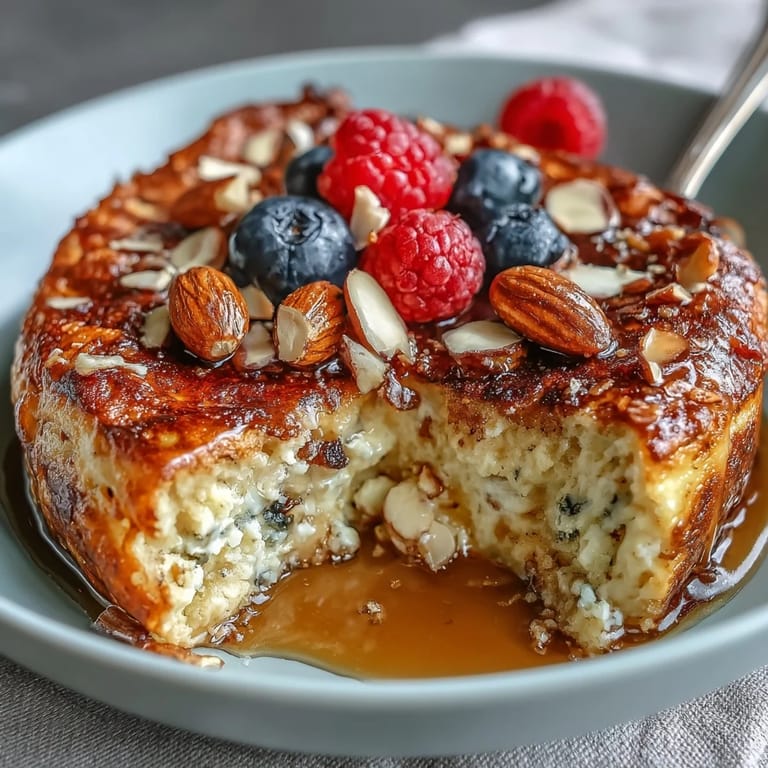
 This little bowl has become my weekday anchor, the one thing I can count on when mornings feel rushed or uninspired. It's proof that high-protein doesn't have to mean sacrificing texture or joy, and that sometimes the best recipes are the ones you can make half-asleep and still love.
Recipe Questions
- → Why is the center soft when I first take it out of the oven?
The center appears soft while hot because residual heat continues cooking the batter as it cools. Letting it rest for 5–10 minutes allows the texture to set properly while maintaining moisture. This ensures you get that fluffy, cake-like consistency without being dry.
- → Can I make this without protein powder?
Yes, substitute the 25 g of protein powder with an equal amount of flour or oat flour. You'll lose some protein content, but the texture will still work well. Consider adding an extra egg white or Greek yogurt to maintain the high-protein benefit.
- → What type of protein powder works best?
Vanilla or white chocolate whey or casein protein powders blend seamlessly into the batter. Plant-based options also work, though they may yield slightly different textures. Avoid unflavored powders if you want that classic pancake taste—vanilla adds essential sweetness and aroma.
- → How do I know when it's fully baked?
The edges should appear lightly golden, and the surface should feel set rather than jiggly. A toothpick inserted near the center may come out slightly moist—that's normal. The 20–22 minute baking time at 180°C typically achieves perfect results, but all ovens vary slightly.
- → Can I double the recipe for multiple servings?
Absolutely. Multiply all ingredients by the number of servings you need, then distribute the batter among individual ramekins or bowls. Each bowl should hold at least 650 ml for proper rising. Bake time remains the same, making it efficient for meal prep or family breakfasts.
- → What makes this different from regular pancakes?
This bowl version requires no flipping, no griddle, and no standing over the stove. The baking method creates a uniform texture throughout—no raw centers or burnt edges. Plus, the single-serve portion control and meal prep potential make it more practical for busy mornings than traditional batch-cooked pancakes.