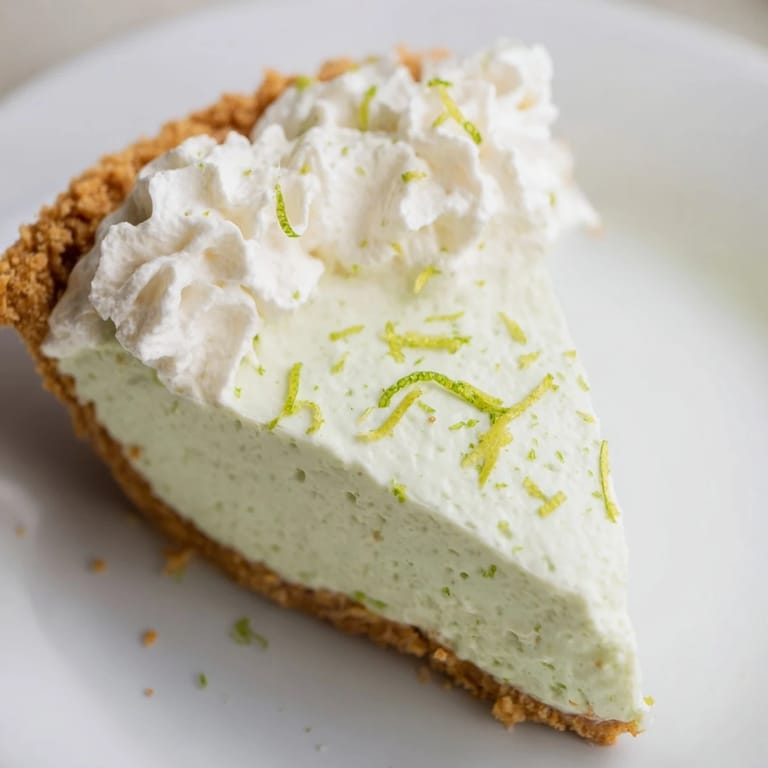
 Save to Pinterest
 The first time I made key lime pie, I was standing in a kitchen that wasn't mine—a borrowed beach house kitchen, to be exact—and I realized I'd grabbed regular limes instead of key limes at the market. My friend was already setting the table outside, and I had maybe forty minutes before guests arrived. So I squeezed what I had, added a splash more juice to compensate, and hoped for the best. That pie turned out to be the thing everyone asked about for years afterward, which taught me something important: sometimes the constraint becomes the charm.
I've made this pie on lazy Sunday afternoons, at midnight before a dinner party I almost forgot about, and once in the middle of a summer when the heat felt unbearable and I needed something cold and sharp to cut through it. My kitchen would smell like butter and toasted graham cracker, and I'd remember why people keep coming back to this recipe—it's the kind of dessert that feels both comforting and bright, familiar and somehow always a little bit special.
Ingredients
- Graham crackers: Crush them by hand or in a food processor until they look like damp sand—not too fine, or your crust becomes dense and hard to bite through.
- Unsalted butter: Melted and still warm is key; it helps everything bind together without leaving greasy patches.
- Granulated sugar: Just enough to give the crust a subtle sweetness that won't compete with the filling.
- Sweetened condensed milk: This is the backbone—don't skip it or substitute it, as it creates that silky, custardy texture.
- Key lime juice: Fresh is lovely if you can find key limes, but bottled works beautifully too; the acid is what makes this pie sing.
- Lime zest: Grate it fresh right before mixing; it adds brightness and prevents that slightly dull flavor pastries sometimes get.
- Egg yolks: They thicken the filling and give it richness without making it heavy.
- Heavy cream: Cold cream whips better and holds its peaks longer; keep it in the fridge until the last moment.
- Powdered sugar and vanilla extract: These balance the whipped cream so it's sweet enough to complement the tart pie without tasting like pure sugar.
Tired of Takeout? 🥡
Get 10 meals you can make faster than delivery arrives. Seriously.
One email. No spam. Unsubscribe anytime.
Instructions
- Heat your oven and prep:
- Set your oven to 175°C and let it come fully to temperature while you work. This ensures the crust bakes evenly and doesn't stay pale and soft.
- Build the crust:
- Toss your graham cracker crumbs with warm melted butter, sugar, and salt until everything looks like the texture of wet sand. If you squeeze a handful and it holds together, you've got the right consistency.
- Press and bake the crust:
- Press the mixture firmly into the pie pan, working it up the sides with your fingers or the bottom of a measuring cup. Bake for 10 minutes until it's lightly golden and smells toasted—this step makes all the difference in preventing a soggy crust later.
- Make the filling:
- While the crust cools slightly, whisk together condensed milk, key lime juice, lime zest, and egg yolks until the mixture is completely smooth with no streaks of yolk visible. The acid in the lime juice will slightly thicken the condensed milk, which is exactly what you want.
- Pour and bake:
- Slide the filling into the warm crust and smooth the top with a spatula. Bake for 15 minutes—the center should still jiggle just slightly when you shake the pan gently, which means it will set up perfectly as it cools.
- Cool and chill:
- Let the pie sit at room temperature for an hour, then refrigerate for at least 2 hours. This is not a step to rush; the filling needs time to firm up completely or it will be custard-like instead of sliceable.
- Whip and top:
- Beat cold heavy cream with powdered sugar and vanilla until soft peaks form—don't overbeat or you'll end up with sweet butter. Top each slice just before serving so the whipped cream stays fluffy and doesn't weep.
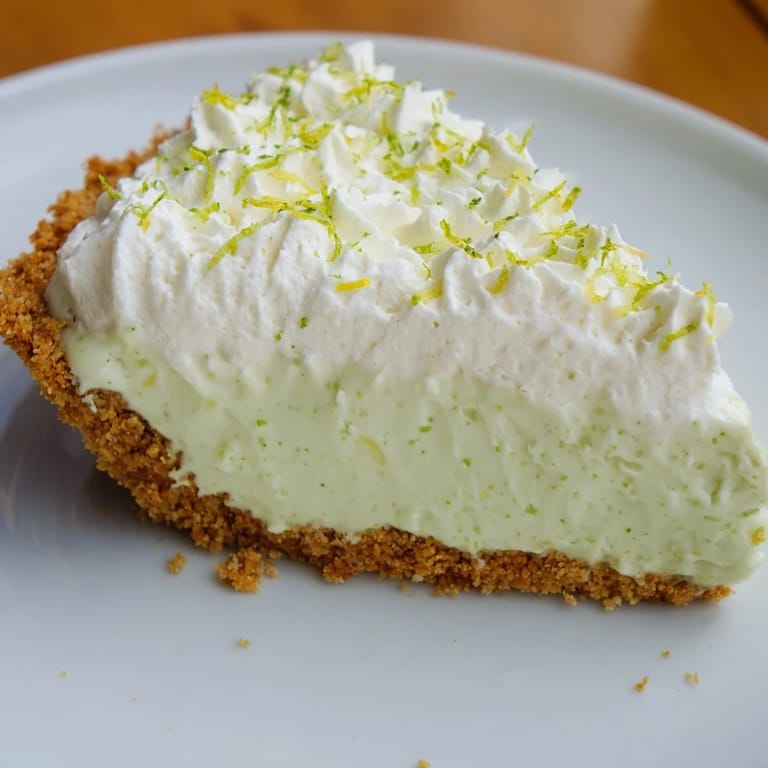 Save to Pinterest
 There was a moment, years ago, when I realized this pie had become more than just a recipe—it was the thing I brought when someone needed comfort, the dessert that made people smile at the table, the reason friends started asking if I was making my "famous key lime pie" for the gathering. I'd never set out to become known for one thing, but I'm genuinely grateful it's this one.
The Story Behind the Simplicity
Key lime pie is a Florida classic, and there's a reason it's been made the same way for decades—because it works. The combination of condensed milk and lime juice is almost chemistry-like in how it transforms into a creamy custard. I think of it as one of those recipes that feels old-fashioned in the best way, like your grandmother might have made it, even if it's actually less than a hundred years old. There's something quietly confident about a recipe that doesn't need trend cycles or reinvention; it just sits there, reliable and beloved.
Variations and Small Tweaks
I've made versions of this pie with regular lime juice when key limes weren't in season, and honestly, the difference is less dramatic than you'd think—you might add a teaspoon more juice to brighten it, but it's still recognizable as key lime pie. Some people swear by digestive biscuits for the crust, which gives you a slightly less sweet base if that appeals to you. There's also the Greek yogurt swap for whipped cream if you want something tangier and less heavy; it changes the character of the dessert, but in an interesting way.
Timing and Make-Ahead Tricks
The beauty of this pie is that you can make it the day before and keep it covered in the refrigerator—in fact, it gets better as it sits and the flavors meld. Make the whipped cream topping just a few hours before serving, or even right before you slice, so it stays at its fluffiest. If you're bringing it somewhere, keep it chilled until the last possible moment, and add the whipped cream and garnish once you've arrived if you can; it travels better without the topping and looks fresher when you finish it in someone else's kitchen.
- The crust can be made up to a day ahead and stored in an airtight container at room temperature.
- The whole pie keeps perfectly for up to three days covered in plastic wrap in the fridge.
- Freeze it for up to a month, thawed in the refrigerator before serving.
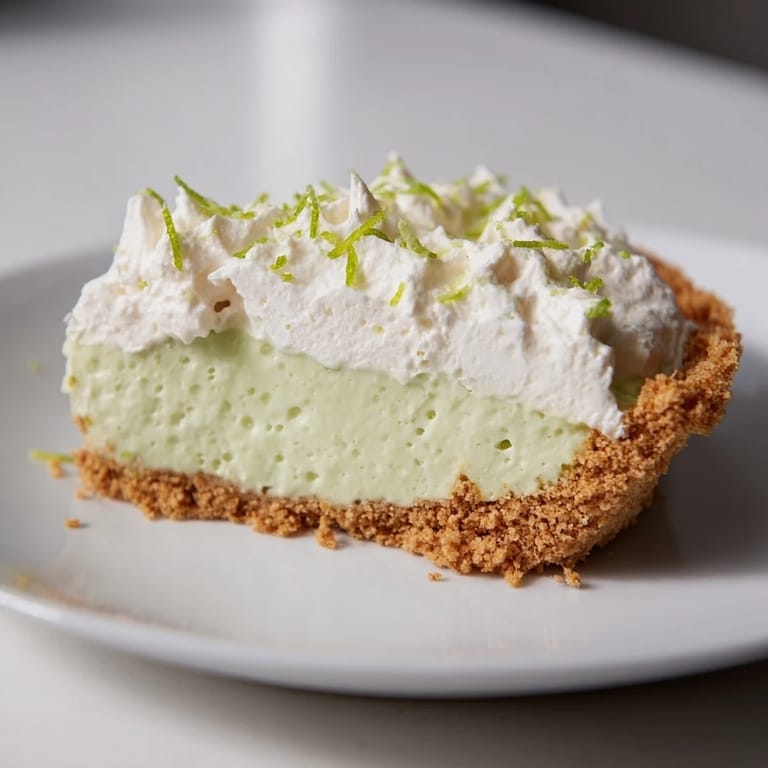 Save to Pinterest
 Make this pie when you want something that feels both effortless and impressive, or when someone you care about needs a reason to smile. It's one of those desserts that doesn't pretend to be anything other than what it is—tart, sweet, creamy, and absolutely worth the three hours of chilling time.
Recipe Questions
- → What makes the crust crisp and flavorful?
The crust combines crushed graham crackers with melted butter and a hint of sugar, baked slightly to create a firm, golden base with a buttery, sweet taste.
- → Can fresh limes be substituted for key limes?
Yes, regular fresh limes can be used if key limes aren’t available; they provide a similar tartness and vibrant citrus flavor.
- → How is the filling's texture achieved?
Mixing sweetened condensed milk with lime juice and egg yolks creates a smooth, creamy filling that firms up gently during baking and chilling.
- → What is the purpose of chilling the dessert?
Chilling allows the filling to fully set and develop a refreshing coolness, enhancing the overall texture and flavor balance.
- → Are there alternatives to traditional whipped cream topping?
Yes, Greek yogurt can be used for a lighter topping that still complements the tart lime filling wonderfully.