 Save to Pinterest
 My daughter came home from school one afternoon with a permission slip for a field trip, and the note at the bottom made my stomach sink: nut-free snacks only. I'd always grabbed granola bars from the store without thinking twice, but suddenly I needed something homemade, wholesome, and genuinely good enough that she'd actually want to bring it. That evening, I stood in the kitchen experimenting with oats and seeds, and by the time I rolled the first batch into golden little spheres, I realized I'd stumbled onto something special—snacks that tasted like a treat but felt like fuel.
I remember packing these into her lunch box that first time, watching her pull one out during snack time through the car window pick-up line. When she got home, she asked if I could make more because her friends were stealing them off her napkin. That's when I knew these weren't just a workaround for an allergy restriction—they'd become the thing everyone in the class wanted.
Ingredients
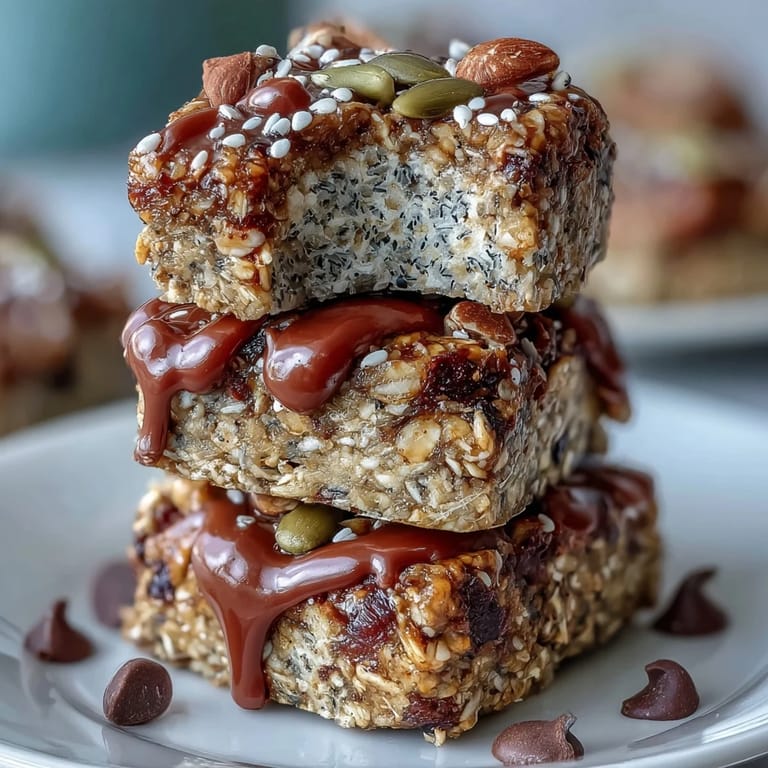
- Old-fashioned rolled oats (1 1/2 cups): These are your texture foundation, giving the balls that chewy-sturdy quality that holds everything together without feeling gummy or dense.
- Toasted sunflower seeds (1/2 cup): They add a subtle nutty depth that keeps the recipe interesting, and toasting them first brings out their flavor in a way raw seeds never quite manage.
- Pumpkin seeds (1/4 cup): These little green gems add protein and a slight earthiness that balances the sweetness without overpowering it.
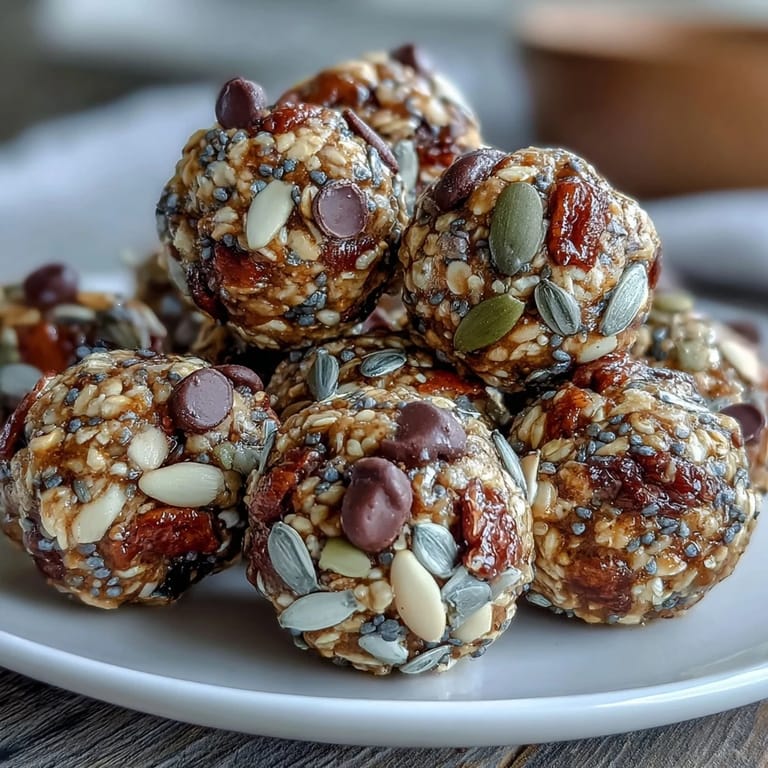
- Mini chocolate chips (1/3 cup, nut-free brand): Check the label carefully because regular chocolate chips sometimes hide tree nut warnings—the mini version melts slightly when rolled, creating pockets of sweetness throughout.
- Unsweetened shredded coconut (1/2 cup, optional): If you use it, it adds moisture and a subtle tropical note, but skip it entirely if coconut allergies are a concern in your household.
- Sea salt (1/4 teaspoon): This tiny amount doesn't taste salty—it amplifies the honey sweetness and makes every flavor pop.
- Sunflower seed butter (1/2 cup): This is your binder, the ingredient that makes everything stick together; if you can't find it, tahini or soy butter work in a pinch, though the flavor shifts slightly.
- Honey (1/3 cup): Raw or regular both work, but raw honey keeps a slightly lighter color and more complex flavor that you'll taste in the finished ball.
- Pure vanilla extract (1 teaspoon): Don't skip this or use imitation—those few drops make the difference between a snack and something that tastes homemade.
Tired of Takeout? 🥡
Get 10 meals you can make faster than delivery arrives. Seriously.
One email. No spam. Unsubscribe anytime.
Instructions
- Gather and measure everything:
- Lay out all your dry ingredients in one bowl so you can see the color variations—the golden oats, the tan seeds, the bright green pepitas. This takes thirty seconds and prevents you from realizing midway through that you forgot something.
- Mix the dry team:
- Combine oats, sunflower seeds, pumpkin seeds, chocolate chips, coconut, and salt in a large bowl, stirring with a spatula until the ingredients are evenly distributed. You'll notice the mixture looks almost finished already, which is deceptively close to the truth.
- Create the sticky base:
- In a separate bowl, whisk together sunflower seed butter, honey, and vanilla until the mixture is smooth and pourable without any streaks of sunflower butter visible. This takes about one minute of actual work.
- Bring them together:
- Pour the wet mixture over the dry ingredients and stir with determination until you can't see any dry oats clinging to the bottom of the bowl. The mixture should feel slightly tacky and hold together when you squeeze a handful—if it's too dry, add honey by the teaspoon.
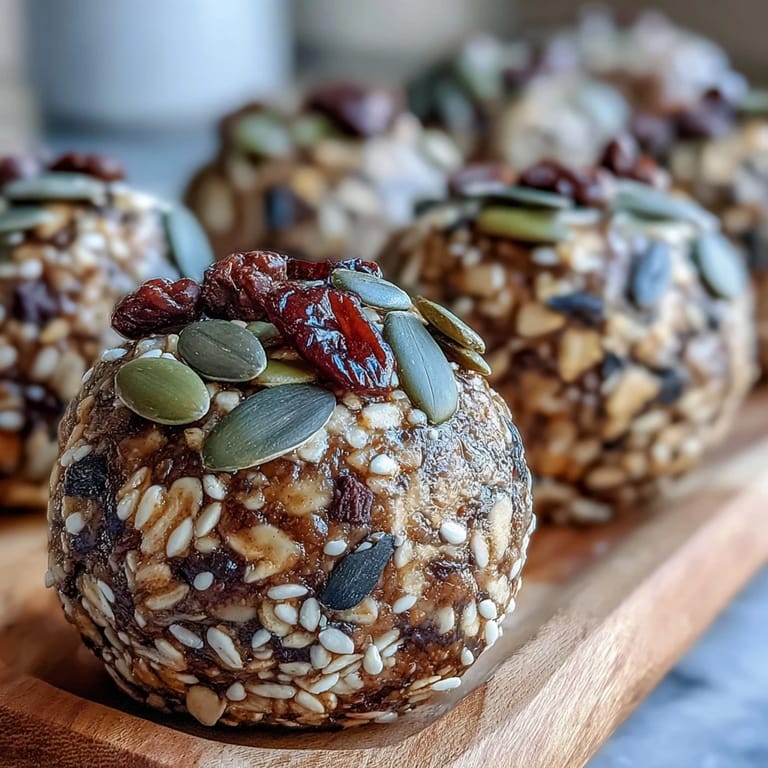
- Roll with your hands or a scoop:
- Using either your slightly damp fingertips or a small cookie scoop, form the mixture into 1-inch balls and set them on a parchment-lined tray. If your hands get sticky, dip them in cold water between rolls.
- Chill until they're firm:
- Refrigerate the tray for at least thirty minutes, though overnight makes them even more stable and easier to store. They'll keep in an airtight container in the fridge for up to a week, though they rarely last that long in our house.
 Save to Pinterest
 There's a moment during field trip season when a parent realizes their homemade snack has become the small thing that matters—not because it's fancy, but because it works. These energy balls have become that thing in our house, the snack that shows up in lunchboxes, backpacks, and offered to friends without hesitation.
Flavor Variations That Actually Work
Once you've made the base version a few times and know exactly how it should feel in your hands, you can start playing. I've added half a teaspoon of ground cinnamon and watched it warm up the entire flavor profile, or swapped the chocolate chips for dried cranberries when I wanted something less sweet. One afternoon, I pressed a single sunflower seed into the top of each ball before chilling them, which added nothing to the taste but looked intentional enough that people thought I was a much more ambitious cook than I actually am.
Making Them School-Lunch Safe
The sunflower seed butter was my solution when regular peanut butter suddenly became off-limits, but it turned out to be better in this recipe anyway—it's slightly less intense, letting the oats and seeds shine through. If your school is extra cautious, you can use soy butter instead, though the texture becomes slightly different and you might need a tiny bit more honey to get the mixture to hold together properly.
Storage and Make-Ahead Strategies
These are the ultimate make-ahead snack because they actually improve when you give them time in the fridge to set. I've stored them for up to two weeks in an airtight container, and they've traveled well in lunchboxes, car seats, and backpacks without falling apart or melting. One trick I discovered by accident: if you need them to last longer or want to make a double batch, you can freeze them for up to a month, then thaw them on the counter about thirty minutes before eating.
- Layer them between parchment paper in the container so they don't stick to each other.
- Keep them in the coldest part of your fridge if you're storing them for more than a few days.
- If they soften at room temperature, pop them back in the fridge for fifteen minutes to firm up again.
 Save to Pinterest
 What started as a permission slip panic turned into one of those quiet kitchen victories that keeps giving. These energy balls have made so many lunchboxes better, one small golden sphere at a time.
Recipe Questions
- → Can I substitute sunflower seed butter with another spread?
Yes, soy butter is a safe alternative that maintains the nut-free status and offers a similar creamy texture.
- → How long should the energy balls be refrigerated before serving?
Refrigerate them for at least 30 minutes to firm up and hold their shape better when served.
- → Are these energy balls gluten-free?
They can be gluten-free if you use certified gluten-free oats in the dry ingredients.
- → Can I add spices to enhance the flavor?
Yes, adding 1/2 teaspoon of ground cinnamon offers a warm, fragrant note to the mix.
- → What are some good ingredient swaps for mini chocolate chips?
Dried cranberries or raisins provide natural sweetness and a chewy texture as alternatives.
- → How should these energy balls be stored for best freshness?
Store them in an airtight container in the refrigerator for up to one week.