 Save to Pinterest
 My daughter came home from school talking about a Fourth of July party at her friend's house, and I realized I'd volunteered to bring dessert without actually planning what that dessert would be. Standing in the kitchen that afternoon, I spotted red and blue food coloring in the back of a cabinet and suddenly saw it—those perfect patriotic stripes stacked in clear cups. What started as a last-minute idea turned into something so striking that people asked for the recipe before they even tasted it.
I'll never forget my nephew's face when he realized each stripe was a separate flavor—he tried to eat them in order, one color at a time, which took him way longer than everyone else. That's when I knew these cups had something special: they turned eating dessert into a little moment of discovery, not just another spoonful of something sweet.
Ingredients
- Red Layer—1 (3 oz / 85 g) box strawberry or cherry flavored Jello: Pick whichever flavor makes you happier; they both work beautifully and the color stays vibrant even after a day in the fridge.
- Red Layer—1 cup (240 ml) boiling water: Hot water dissolves the powder completely, which is the only way to avoid grainy bits in your final jello.
- Red Layer—1/2 cup (120 ml) cold water: This cools things down just enough so you're not waiting forever for the layer to set.
- White Layer—1 envelope (0.25 oz / 7 g) unflavored gelatin: This is what makes the white layer creamy instead of see-through, so don't skip it even though it seems fussy.
- White Layer—1/2 cup (120 ml) cold water: The gelatin needs this quiet moment to bloom before you add heat, kind of like letting bread dough rest.
- White Layer—1/2 cup (120 ml) boiling water: This dissolves the bloomed gelatin into something smooth and cohesive.
- White Layer—1 cup (240 ml) sweetened condensed milk: This is what turns the white layer from boring to rich and creamy; it's the whole point of this layer existing.
- Blue Layer—1 (3 oz / 85 g) box blue raspberry flavored Jello: Blue raspberry has a fun, slightly tart personality that balances the sweetness of the condensed milk beautifully.
- Blue Layer—1 cup (240 ml) boiling water: Same deal as the red layer—hot water means no dissolving headaches.
- Blue Layer—1/2 cup (120 ml) cold water: This gets your blue layer to the right consistency so it sets properly.
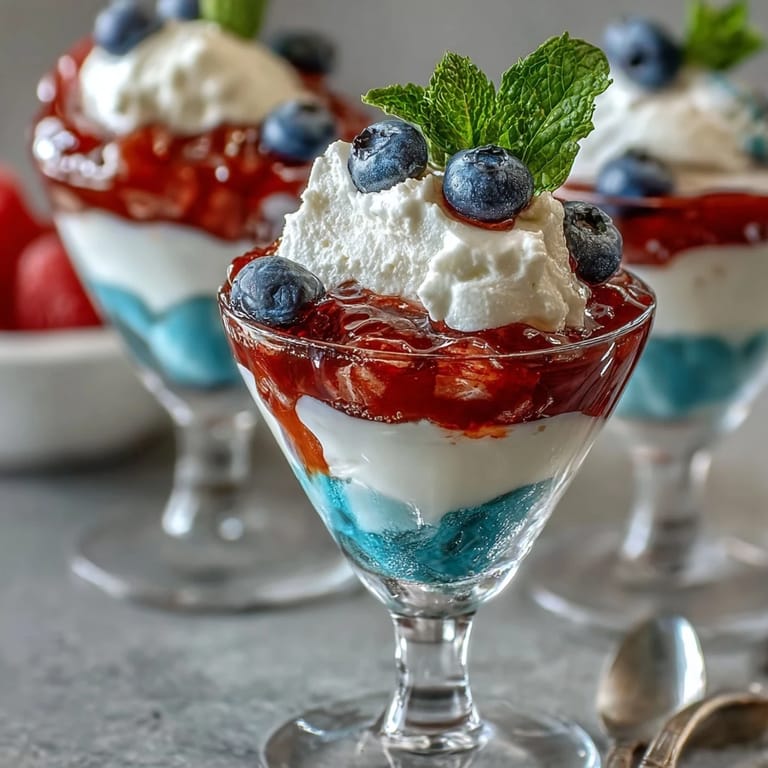
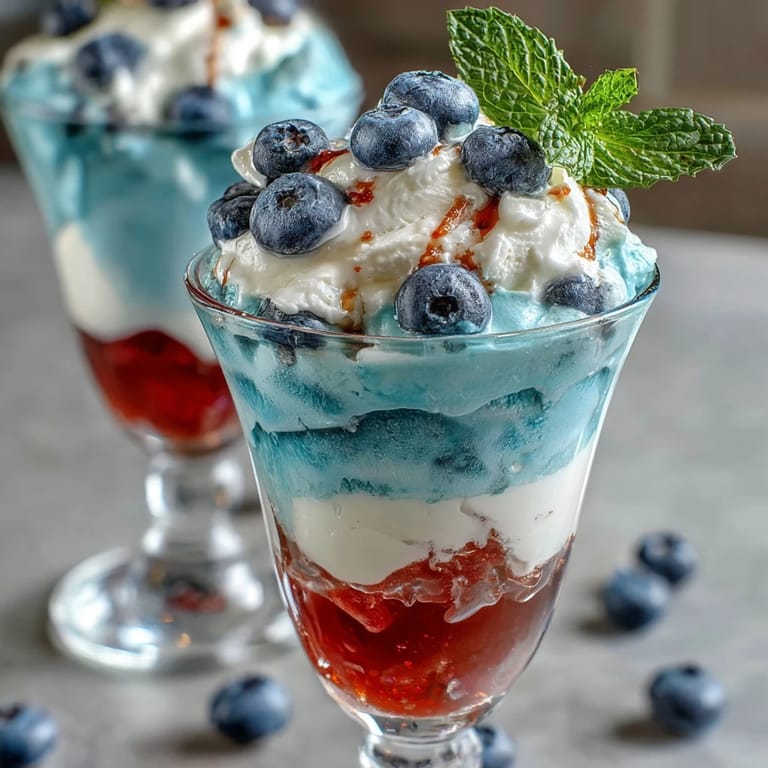
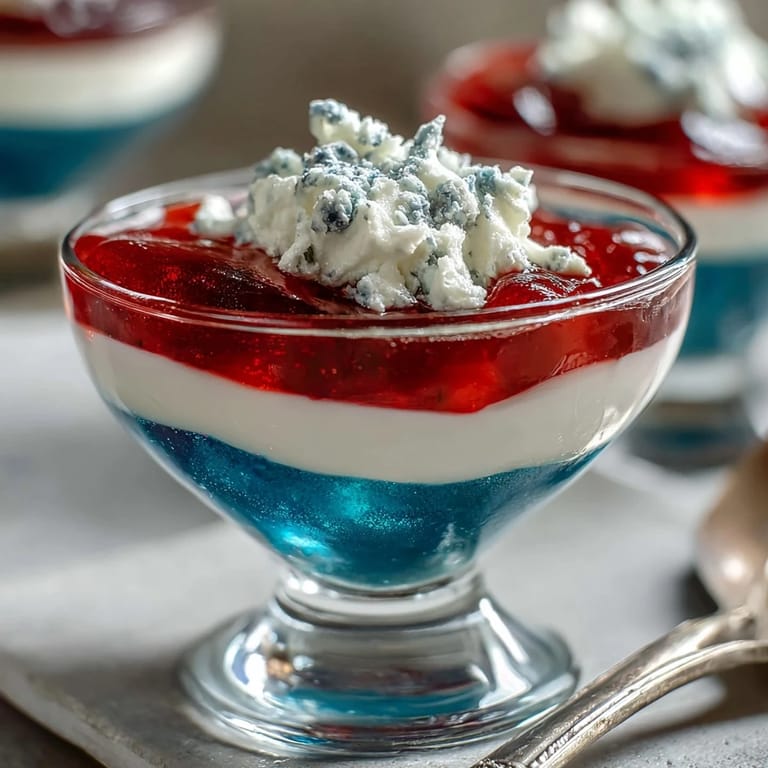
- Optional Garnish—Whipped cream and fresh berries: A dollop of whipped cream on top makes these feel fancy, and fresh berries add brightness that reminds people this is actually a fruit-forward dessert.
Tired of Takeout? 🥡
Get 10 meals you can make faster than delivery arrives. Seriously.
One email. No spam. Unsubscribe anytime.
Instructions
- Set Up Your Canvas:
- Gather eight clear cups—the kind that hold six to eight ounces—and lay them out where you have a clear path to the refrigerator. Clear cups are non-negotiable here because half the magic is seeing those layers stack up.
- Build the Red Foundation:
- Pour one cup of boiling water over your strawberry or cherry Jello powder and stir it until every speck of powder disappears into the water. Add half a cup of cold water, stir it together, and then divide this mixture evenly between your eight cups—about two tablespoons per cup feels right.
- Chill at an Angle:
- Here's the trick nobody tells you: tilt those cups slightly using a muffin tin or even a baking dish angled with a kitchen towel underneath. This diagonal set makes the layers look more dramatic and professional when you eventually stand them upright. Let them chill for forty-five minutes to an hour until the red layer feels completely firm to the touch.
- Prepare the Creamy Middle:
- Sprinkle your unflavored gelatin over half a cup of cold water in a clean bowl and just let it sit there for five minutes—this is blooming, and it's crucial. Then pour half a cup of boiling water over that bloomed gelatin and stir gently until it's completely dissolved and smooth. Stir in one cup of sweetened condensed milk until there are no streaks, then let it cool to room temperature, which takes about ten minutes if you're patient or fifteen if you keep checking it.
- Add the Creamy Layer:
- Once your red layer is absolutely set, carefully pour the white mixture onto each cup—about two tablespoons per cup again—and go slow so you don't accidentally puncture the layer below. Now set your cups upright and refrigerate them for another forty-five minutes to an hour until the white layer feels completely firm.
- Crown with Blue:
- Dissolve your blue raspberry Jello in one cup of boiling water, stir in half a cup of cold water, and let it cool to room temperature so it doesn't melt the white layer when you pour it. Pour this gently over the white layer—about two tablespoons per cup—and refrigerate upright for at least two hours, though overnight is even better if you're not in a rush.
- Finish with Flourish:
- Just before serving, top each cup with a dollop of whipped cream and a few fresh blueberries or strawberries for that extra patriotic touch.
 Save to Pinterest
 I made a batch of these for my book club last month, and something unexpected happened: people actually paused their conversations to admire them before eating. That moment reminded me that food doesn't always have to be complicated to feel special—sometimes the simple act of taking care with the layers is what makes something memorable.
The Secret to Sharp, Beautiful Layers
The biggest lesson I learned came from my first attempt, when I got impatient and poured the blue layer onto a white layer that wasn't quite set. The colors bled into each other and created a murky purple stripe that looked accidental rather than intentional. Now I use the touch test: if the layer feels completely firm and doesn't jiggle when you gently tap the cup, it's ready for the next one. Patience is literally the only technique this recipe requires, and it pays off immediately.
Why Clear Cups Matter So Much
You could make these in any container, technically, but you'd lose about eighty percent of their appeal. Clear cups let people see exactly what they're getting into before they take a bite, and there's something satisfying about watching those three colors stack up in front of you. I've started collecting different sizes of clear cups because now I make these for everything from Independence Day to casual summer dinners.
Flavor Combinations to Try
Once you master the basic red-white-blue combination, you can start experimenting with other flavor pairings. Strawberry, vanilla, and lime creates a completely different mood, or you could do cherry, coconut, and blueberry for something more summery and fruit-forward. The technique stays exactly the same; you're just swapping out which flavors make you happy.
- Tropical versions work beautifully with pineapple, coconut milk, and blue raspberry for a vacation-in-a-cup vibe.
- Don't be afraid to taste your jello mixture before it sets; you'll get a sense of whether the flavor balance feels right to you.
- If you're making these for guests with dietary restrictions, you can swap the sweetened condensed milk for coconut milk or oat milk and they'll still be creamy and delicious.
 Save to Pinterest
 These cups turned out to be the kind of dessert that people actually remember, which is rare enough that it's worth repeating. Once you've made them once, you'll find yourself making them for every occasion that calls for a little patriotic cheer.